Until next time...
***All content is Copyright year and date of posting, and are the sole property of C4G/CCW unless otherwise noted. All rights reserved. Unauthorized reproduction of any part of this website(text, photo's, etc)is strictly prohibited(linking to the post is OK).***
1/12/2008
More beaded treasures!
1/11/2008
Okay...I'm addicted...big time...
I finished my first second tatted piece in two days time.
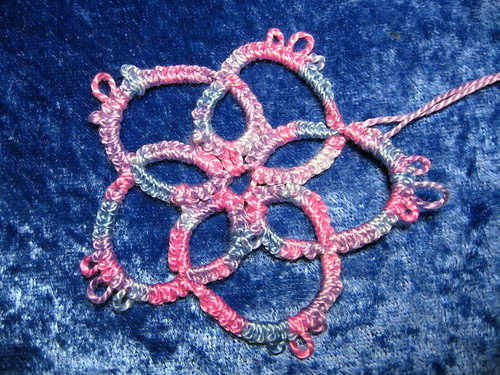
It is actually supposed to be a six petal flower but ended up being five because I misunderstood that the "very large picot" really did mean VERY LARGE. I could only fit five petals in, but hey! It looks swell none-the-less! I love it! I think it would look great on a barrette.
I have been browsing the variety of tatting shuttles out there and my-OH-my how tempting it is! I've purchased two sets of Buffalo bone shuttles hand made by craftsmen in India. The seller says "These are not mass produced. They are each made individually by craftsmen in India. The buffalo are domestically raised and the skin and meat are also consumed." Yeah! Way to support the small farmer aye?
I am currently working on a snowflake from the book Easy Tatting:
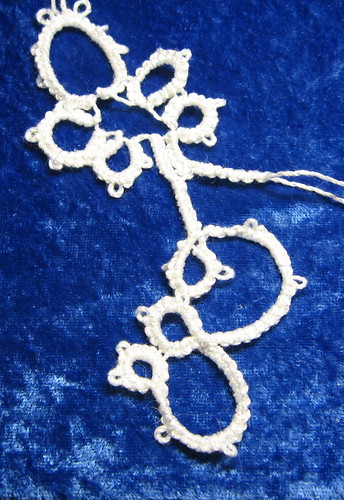
It is a bit of a challenge with all the turns it has. I have found when I am working the self-closing rings that I run out of threat. I have a hard time drawing more through the stitches because the thread has an iridescent strand that likes to get caught on everything. So, to solve this small issue, I take a lot of thread of the shuttle so that I have more than enough thread to finish the ring. I wrap the extra thread around my pinky like I do when making a chain.
My co-worker took me to one of the local thrift stores and I found some green crochet thread (I wanna make clovers for St. Patties day) and a "Clark's Big Ball" of #20 purple & white variegated thread. This will make pretty hearts for earrings! I also found a pretty & small sewing box to keep my extra shuttles and tatting supplies in.
While I was out today, I stopped by the bead shop on the east side and picked up some coin shell beads to make a pair of earrings. I have been planning on making these with coin pearls but I cannot seem to find them anywhere at the moment and the bead shop down the street (Bonjour Beads) is closed till February. The owner is taking a "hiatus" from running the shop. Always when I want beads for a project I tell yeah! LOL So I will have to wait till she reopens for those and I hope she has them still. The other bead shop that I would have gone to closed last summer. The rock shop might have them but they charge too much. My other option is purchasing online, but that can get expensive too!
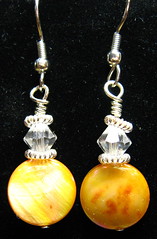
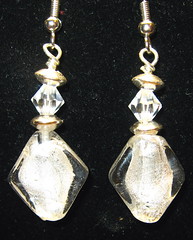
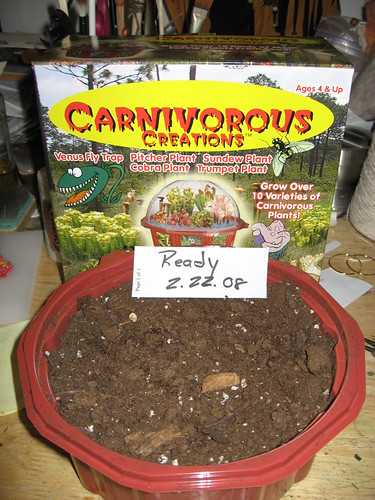
Then I took the 40% Internet coupon for Hobby Lobby and bought a Carnivorous plant growing kit. The bowl of dirt with seeds sprinkled on top has to sit in the fridge for six weeks, and then germination could take upwards of 4 weeks. They should start growing just in time for spring!!
I had a lady on Ravelry beg me to do a basic spinning tutorial video so I will be working on that this weekend. I had planned on going to an intensive this weekend, but I did not get paid from both jobs because of winter break so I do not have the money to spare for this one this time. I have plenty to keep me busy here anyways!!
Karate has been kicking my butt. Trying to get back into the habit of going twice a week (three times a week for the next 4 weeks however to make up for 4 missed classes). Mr. Shaub has worked us hard! Yesterday we did crunches, push-ups, sit-ups, lunches, jumps....OOOOooo do I hurt!! I didn't sleep well because every toss I made I was in pain. WHEW!!
Well that about sums up the last week. Back to tatting!
Until next time...
***All content is Copyright year and date of posting, and are the sole property of C4G/CCW unless otherwise noted. All rights reserved. Unauthorized reproduction of any part of this website(text, photo's, etc)is strictly prohibited(linking to the post is OK).***
9/23/2007
Second secret of the Stole swatch...swatched
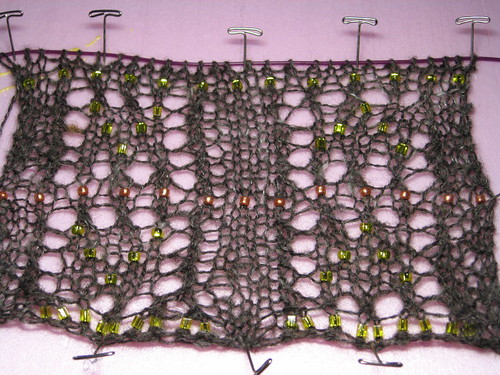
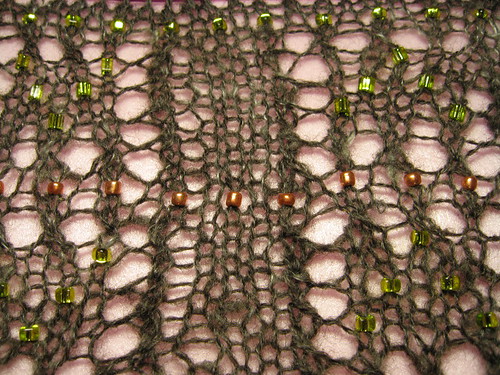
Well I went on a hunt for beads that would fit my yarn and large enough to get a crochet hook (#12) through. I found some at Fat Cat Beads on the east side...for about the same price as online. I bought some "Japanese" square and triangle beads. I like the triangle ones better as they are not as long as the square ones and sit on the stitches better. I am not so sure about that bead shop. The lady was a little wierd who checked me out. Maybe she was just tired as they closed soon after I checked out.Then, today, we went out to the west side to visit the Bead Bin and Wisconsin Craft Market to see what selections they had. Well crap-a-roonie the Bead Bin was closed because they were moving...down the hallway of the West Gate Mall. Grrrr. What a waste of my flippin time and gas money! I found some copper size "E" beads at the craft market, however most of those beads will not fit onto the crochet hook. So although they look nice in contrast to the yarn, they are a pain to sort.
So I guess I should be thankful that I was able to find beads that I like on the east side instead of the west. Now I am ready for the SotS to begin in another 2 weeks. In the mean time I am working on the Mystery Stole (pictures soon) and I am kept busy by the constant need to spin more yarn for all my projects!


Until next time...
***All content is Copyright year and date of posting, and are the sole property of C4G/CCW unless otherwise noted. All rights reserved. Unauthorized reproduction of any part of this website(text, photo's, etc)is strictly prohibited(linking to the post is OK).***
9/22/2007
The Louet gets more pretties..

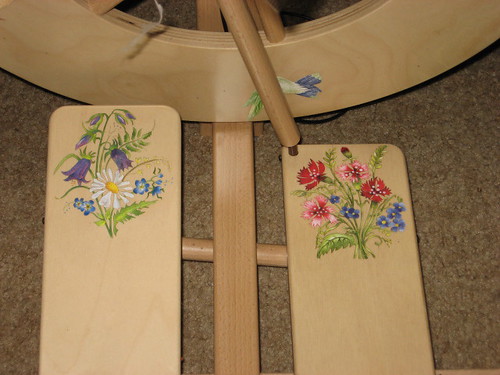
I found the perfect set of rub-ons today at Micheals. They match my vision for the louet perfectly!
I've been busy all week. I am right down tuckered out! I did find some beads locally that I will try with the yarn for the Mystery Stole KAL. Damn! It's hard to find size 6 seed beads now. I went to two bead stores and neither one had a very large selection of that size...and one stores selection was right down laughable! So I settled on some square and triangle "japanese" beads that look like have large enough holes to poke a fine crochet hook through. Hopefully.
I guess I will gander to the west side tommorrow and check out a few more bead shops.
Until next time...
***All content is Copyright year and date of posting, and are the sole property of C4G/CCW unless otherwise noted. All rights reserved. Unauthorized reproduction of any part of this website(text, photo's, etc)is strictly prohibited(linking to the post is OK).***
9/03/2007
Making a Counting Rows Bracelet
Materials
Memory Wire
Heavy-Duty Wire cutters (don't use the dainty jewelry wire cutters as they are not hard enough to cut memory wire and you will end up with an uneven edge in your cutters. Ask me how I know this! *face-palm*)
9 pattered beads that are slightly smaller than
10 solid colored beads.
4 size 6 seed beads in coordinating colors to other beads
3 medium decorative beads
Each smaller bead represents a row of knitting. Each larger bead represents 10 rows of knitting. When you are done knitting one row, slide the marker over one small bead. When you reach the 9th bead (9th row) slide the marker back to the beginning of the smaller beads and move one larger bead to the other side of the marker. You are now ready to count row 11 and onward.
Stretch cording that will fit through size 8 seed beads
Size 9 seed beads in coordinating or contrasting color to your larger beads (You will need Approx 12)
One small crimp bead
Crimping pliers
Round Nose jewelry pliers
Flat nose jewelry Pliers
Optional: Big eye needle and regular pliers
- Make Two: Round one end of some memory wire, slip over wrist and cut the wire just so it overlaps the loop on the other end. DO NOT ROUND THIS END YET. You need it open to slip the beads onto the wire.
- Slide each of these beads in this order onto BOTH wires: #6 seed bead, medium decorative bead, #6 seed bead. Slide all three down to the loops at the end.
- String your 9 decorative beads onto one
wire, then slide the other 10 slightly larger solid colored beads onto the other wire.
- Slide each of these beads in this order onto BOTH wires: #6 seed bead, medium decorative bead, #6 seed bead. Slide all three down to the other beads.
- Create a loop on the straight ends of the memory wires.
- String 10 #8 seed beads, one medium decorative bead, and one crimp bead onto some stretchy cord. Using a big eye needle helps in this task a great deal. Now re-thread the cord back through the beads from the opposite end, pull tight but not too tight and clip the cord with several inches to spare. Thread the loose end through the crimp bead (each end should be poking out in the opposite direction), pull tight and crimp the crimp bead. Trim ends
- Optional, add medium decorative bead with a split ring as pictured below (I actually thought of this after I had the ring of beads already made...HA!). The decorative beads adds some grabbing power to get the ring of beads up and over the bigger beads. Because fingers are chunky and dry, I found grabbing at just the ring a bit cumbersome. The decorative beads makes it much easier to grasp.
- Sit back and marvel at your craftiness!!
Until next time...
***All content is Copyright year and date of posting, and are the sole property of C4G/CCW unless otherwise noted. All rights reserved. Unauthorized reproduction of any part of this website(text, photo's, etc)is strictly prohibited(linking to the post is OK).***