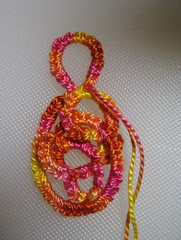
I got the Tatting Bug! I finally figured out the knot-flop and I went to town doing different things and techniques. As I progress I began to see a Goddess being born! Tatting Goddess? It is about 2 inches long and about an inch wide, perfect as a charm but how would I protect it? Any ideas?
I had thought about encasing it in some polymer casting...but I dunno about that. What do you think?
Until next time...

Adventure Seeker - Crafting Extraordinaire
Showing posts with label crafts. Show all posts
Showing posts with label crafts. Show all posts
1/06/2008


11/30/2007
YEAY! Blue Uniform!
My blue karate uniform finally came in this week. I am busily hemming up the legs as they are about two feet longer than I need! I am vertically challanged, I admit it.
Along with that, I got my foam "training" nun-chucks, my sparring boots I ordered, and a neat-o "Black Belt Team" t-shirt! Photos to come as I have promotion tonight!! I am going to purple belt!! I made my goal! The BF is taking me out for Sushi in celebration tonight (if he hasn't forgotten he agreed to do so!).
My MP soap supplies came today so I am busy playing with that as well. I am making soap for the spa "Pamper Yourself" kits for the holidays this year. One for mom, the BF's parents, my WTI Advisor, my co-worker, my boss at the yarnhouse...and possible some internet friends. :)
Well I gotta get crackin. I still need to sew the hems on those pants before tonight!
Until next time...
***All content is Copyright year and date of posting, and are the sole property of C4G/CCW unless otherwise noted. All rights reserved. Unauthorized reproduction of any part of this website(text, photo's, etc)is strictly prohibited(linking to the post is OK).***
9/03/2007
Making a Counting Rows Bracelet
Here is how to make a memory wire counting rows bracelet.
Materials
Materials
Memory Wire
Heavy-Duty Wire cutters (don't use the dainty jewelry wire cutters as they are not hard enough to cut memory wire and you will end up with an uneven edge in your cutters. Ask me how I know this! *face-palm*)
9 pattered beads that are slightly smaller than
10 solid colored beads.
4 size 6 seed beads in coordinating colors to other beads
3 medium decorative beads
Each smaller bead represents a row of knitting. Each larger bead represents 10 rows of knitting. When you are done knitting one row, slide the marker over one small bead. When you reach the 9th bead (9th row) slide the marker back to the beginning of the smaller beads and move one larger bead to the other side of the marker. You are now ready to count row 11 and onward.
Stretch cording that will fit through size 8 seed beads
Size 9 seed beads in coordinating or contrasting color to your larger beads (You will need Approx 12)
One small crimp bead
Crimping pliers
Round Nose jewelry pliers
Flat nose jewelry Pliers
Optional: Big eye needle and regular pliers

- Make Two: Round one end of some memory wire, slip over wrist and cut the wire just so it overlaps the loop on the other end. DO NOT ROUND THIS END YET. You need it open to slip the beads onto the wire.
- Slide each of these beads in this order onto BOTH wires: #6 seed bead, medium decorative bead, #6 seed bead. Slide all three down to the loops at the end.
- String your 9 decorative beads onto one
 wire, then slide the other 10 slightly larger solid colored beads onto the other wire.
- Slide each of these beads in this order onto BOTH wires: #6 seed bead, medium decorative bead, #6 seed bead. Slide all three down to the other beads.
- Create a loop on the straight ends of the memory wires.
- String 10 #8 seed beads, one medium decorative bead, and one crimp bead onto some stretchy cord. Using a big eye needle helps in this task a great deal. Now re-thread the cord back through the beads from the opposite end, pull tight but not too tight and clip the cord with several inches to spare. Thread the loose end through the crimp bead (each end should be poking out in the opposite direction), pull tight and crimp the crimp bead. Trim ends
- Optional, add medium decorative bead with a split ring as pictured below (I actually thought of this after I had the ring of beads already made...HA!). The decorative beads adds some grabbing power to get the ring of beads up and over the bigger beads. Because fingers are chunky and dry, I found grabbing at just the ring a bit cumbersome. The decorative beads makes it much easier to grasp.
- Sit back and marvel at your craftiness!!


Until next time...
***All content is Copyright year and date of posting, and are the sole property of C4G/CCW unless otherwise noted. All rights reserved. Unauthorized reproduction of any part of this website(text, photo's, etc)is strictly prohibited(linking to the post is OK).***
6/26/2007
Spirit Totem Framed!!
 Literally! Ahhh the exhileration of creation!
Until next time...
***All content is Copyright year and date of posting to C4G/CCW unless otherwise noted. Reproduction without permission in any form is strictly forbidden. Violators will be shut-down.***
6/24/2007
I figured it out! Landscape felting...and other needle feltings
 I am almost done with that demo for the LYS down the street. I got inspired to work on it last night so now I am on a creative streak. I decided to needle felt a blue bird onto the corner, just to make it more personal. I have a stash of dozens of different dyed wools in the closet from my dyeing experiments so I dug all that out. Now my work area is a mess again. LOL All in the day of a creative mind I guess.
 Landscape felting!! I finally figured it out after reading on how to make a sheet of felt from roving at this here website
of which I am constantly going back to read. Then I pondered a bit and grabbed some dyed wool.
First I cut a random shape out of some commercial felt material. I have a lot of it from my days of making moccasin templates. I filled the sink with about an inch of hot water, got the piece of commercial felt (CF for short from here on)wet and laid it on one of those sushi roller mat thingys. I found a bunch at the local Big Lots a couple months ago for a buck each. Then I fluffed up some of the dyed wool I have laying around, and placed it onto the wet CF piece in the water and patted it down till it was completely wet. I did this until the wool covered the felt piece and then some.
Then I took some Dawn soap and poured a good portion over the piece and began PATTING at it. Just patting it down into the water was enough to get the felting action going without disturbing the fibers so much that they came apart or clumped up. After the water cooled some, I picked up the whole thing (mat and all) and added fresh hot water. (BTW this I did in the kitchen sink) After the felting had started I was able to lightly rub the wool in a circular motion. Then, since I did not have any bubble wrap, I grabbed a plastic grocery bag, wadded that up and used that to rub even more. WOW! It worked!!! It didn't stick too well to the CF so I was able to peel it off of that. So the commercial felt is a good felting template. Who'd -a-thunk? Next time I think I will make a white base of felted wool before adding the colored wool, just to bring out the color more when it is finished.
So as I looked at the finished piece (which oddly enough looks like the state of Indiana, my home state....go fig!), I got one of those flashes in my head with an image. So I set to work on it. I added silk across the piece because I wanted to add a little sparkle to it. Then I kept getting more and more images of what to put on this piece so I continued to work on it. I worked on this a total of almost 3 hours start to finished. The first picture with the yellow figure was when I thought I was done, but I looked away and I was hit with another image, this time with arms connecting to the silk.


Who or what this is I have no idea. Oddly enough again, the silk looks like lightening. FREAKY!! You can't see it in these pictures but the Mysterious Figure's body is not flat but 2-D. The head comes out from the piece and it looks like, if stare at it, there are eyes and a mouth of which I did not add at all. I figured it was an OOAK, a spirit piece. Now I need a shadow box frame to frame it in because of the 2-D-ness of it. But WOW....I think one of the BF's Creative Bugs crawled over and bit me, bit me BIG TIME!!
Until next time...
***All content is Copyright year and date of posting to C4G/CCW unless otherwise noted. Reproduction without permission in any form is strictly forbidden. Violators will be shut-down.***
6/09/2007
Crow Artwork by Wendy L Wilkerson

WOW! I stumbled across a fantastic artist who does a spectacular job of rendering crows on rice paper! I love this one titled "Knight". I also like another titles "Story Teller". I emailed the artist and asked for a price quote and I am afraid it will be waaaaaaaaaaaay out of my price range. I can always go back and look at her artwork I suppose.
Disclaimer: This painting is Copy Righted to Wendy Wilkerson . I do not claim a right to it by posting it here. The purpose of posting it here is to display the wonderful talent exhibited in the making of such spectacular artwork.
Until next time...
***All content is Copyright year and date of posting to C4G/CCW unless otherwise noted. Reproduction without permission in any form is strictly forbidden. Violators will be shut-down.***
4/28/2007
I found a yarn meter!

Or rather, a fishing line meter. Seems that the Nancy's Knitknacks uses the same brand of fishing line meters made by Shakespeare fishin products. Get ready for this...brace yourself...
Nancy's yarn meter (wood and all) is $50
I paid $14 for the meter alone (that measures in feet instead of yards) that can be clipped securly to just about ANYTHING. I'm wondering why the Nancy product is so darned much money! Being the crafty person I am, I could construct something similar for just a couple bucks! But, I am more ambitious than that. I want to be able to meter the yarn as I wind it onto my skein winder. From what I am thinkin, I think I need to add a dowel through the main stem, and then attach another dowel to it at a right angle so that the meter is in line with the yarn being wound onto the winder.
I tested the meter out and it turns out that I have 100 yards of my silk and alpaca yarn left from the wing of the moth shawl. Hummm...what can I knit out of that?HUmmm, so if I put a screw through the dowl and just have it bolted to the main stem, then I could loosen it to fold down when not in use. I think I have the materials I need for this. If not, it's gonna be a fantastic day to bike down to Menards.
Until next time...
4/22/2007
Wing of the Moth Shawl-FINISHED!!! Another FO!
 Me so Happy!! After six months of knitting on it- on and off- the beast is now finished and being blocked! My LYS is the best! The are just down the street from me and they let me use thier blocking equipment! This is made from 100% hand spun, hand dyed, alpaca and silk by me. EEEEEEEEeeeeeeeeeeeeeee!!!
And now....to start on the Forest Canopy shawl in that loverly green italian yarn I found at Goodwills. I started it but my guage is off on the stated needle size so I need to go down a size. So that is good news because now I do not need to buy more needle tips! I don;t have size eight in the knitpicks options but I do have sevens.

Until next time...
4/21/2007
Belt Display 100% Finished and Hung
 YAY! I got the headboard mounted and now the whole belt display hangs on a living room wall along side my certificates of Achievements. As always, my name is blocked out to protect myself. AHhhhh, one project down....many to go with many new ones birthing!
Until next time...
4/17/2007
Crafting, Gardening, and other things of goodness...
 I found a nice peice of precut wood plaque for the head board to my belt display. It's actually a house number plaque from menards, but HEY it works!!
The spinach seedlings are growing away! It will be time to put them in the garden soon!!!


Here is my outdoor Bast Altar. It is in the garden space.
Then there is Zarnan who, for some odd reason, is wanting to do nothing but bury himself in his diggin box. Wierd tort. I hear this is normal behavior this time of year so I will not worry too much about him. It's still strange that he wants to bury himself at the beginning of warmer weather. Wierd.
Not much to write on today. I am VERY sore from yesterdays Karate practice. Mostly in my hips from round kicking so much. Then I am VERY tired because the BF's fucking midnight fidgeting woke me up. I am sleeping on the sleeper sofa tonight. I am sick and tired (LITTERALLY!!!!) of not being able to get enough sleep because this MAN does nto want to see a doctor about this. His night fidgeting has never been this bad.....something is wrong. But being a MAN, he doesn't want to do a damned thing about it and it is angerying me so!! He has employer provided health insurance. He ought to use it while he has it.
I WANT SLEEP DAMNED IT!! SLEEEEEEEEEEEEEEEP!!! UGH!
Until next time...
4/16/2007
Belt display 90% finished!
 Now all I need to make and design for it is a head board.
Boy that ladder looks ominous from this angle!!

Here it is sitting outside on this wonderfully mild day drying. For some odd reason the first four slats are lighter than the rest. It's odd because I could not get them any darker.
Until next time...
4/14/2007
Made a Lucet, SP10

I made a lucet today! I was in need of one to make a cord for my felted bag so I used some of the oak scraps I have from making my belt display. It reminds me of a goddess figure...of even a swim suit! Totally by accident! But it works great! Now if I were to purchase one of these...I'd be spending anywhere from $20-$40 for one. I have enough scraps left over to make 10 at about $4 each (after cutting, sanding, staining, and sealing)! I'm thinking of making another one for my SP10 pal-ee who BTW recieved her first box and she sounds thrilled to have the spindle and fiber! EEEEEEeeeeeee! *Warm fuzzies!*
I have been working on all sorts of things today. I cleaned Zar's cage and the same corner where he is located. There is a bookcase there and some of the books had fallen out and being the chaotic and scattered person I am, they were left on the floor. So those got picked up and tiddied. Zar's cage smells much better!
We went to community pharmancy today and I bought that jar of Lanolin. I attempted to waterproof my felted bag...but I think I may need to wash it some because it came out...sticky. HUmmm...that didn't work like I thought it would. Oh well. The only thing lost is time as I have to work on getting it not so sticky. Then while up on State Street I stopped by the local artist supply shop and purchased some salmon and purple dye. The BF had to stop in one of the metaphysical stores...the one I really don't care for (Shakti) because they are so materialistic and thier prices are high on those materialistic goods. I can do without all of it....BUT... I did find a new bumber sticker...a mini one that says "Religion is a journey...not a guilt trip." I LOVE IT!!! GODS! My coworker is always beating herself down...drives me NUTTY!!! The Womyn has no value or confidence in her own skills. And she is SO PSYCHIC! Shetold me about a dream that she had and she told me in that dream that we were trying to save a fish...and I was giving her a fish for her Bday!! PSYCHIC MAN!!!
BUT, what really has me peed this weekend about that subject is she really has been ungreatful for the gift. She talked and talked and talked about wanting to get a fish again and I thought I was gonna do a good thing. NO! She keeps COMPLAINING that she doesn't have TIME to take care of a FISH. *scratching head* WTF?!! It's a FISH, not a cat or dog or any other exotic animal....A FISH!!! For crying out loud, it won't keel over and die if it is not fed every stinkin day so go take your weekend trips!! *face-palm* GRrrrrrrrrrr. Then she said that she thought she was gonna have to give it away and I told her flat out-if you don't want the critter, give 'em back because he is GORGIOUS and has gorgious long blue fins. If she gives it away to someone, I will be very upset at her. All that effort to print out care sheets, purchase everything she needed to get started and keep 'em healthy and happy for several months if not longer and then WHAM...GRRRRRRrrrrrrrrrrrr, arrrrrrrrrrrrgh...That is the last time I get a gift for any coworker! The nerve!
Other than that, it's been a quite weekend. All the lists I am a member too are quite so it must be nice weather all around. CRAP...I just remembered that I need to bring the plants in because it is still getting below freezing at night. POOP....
I
Until next time...
4/07/2007
Fiber projects, Mail Call, SP10-Don't you wish you were the lucky recipient?!
 OOOoo look at that freshly spun yarn...OOOOoo. This is hadn dyed alpaca blended with hand dyed silk. I am mixing a bunch of this up for my SP10 Spoilee (who hopefully does not read my blog...but she won't know till she gets her first sets of goodies). This is SSSOoooooooo SOOOOOFFFFT! I plan on filling an oversized coffee cup (because she says she is always on the lookout for them...and we have a store that sells a lot of them for cheap) with the carded fiber roving. Floofy drink UP! *ding-ding* HA! Literally...floofy...
 I got a mail call today! I got a box from the whenever group for the bottle swap. Three skiens of perfectly colored Lullaby yarn, a sock pattern, and some yummy rose scented soap! I think these would look nice as a beaded snood!!
This is one of many things I am sending to my SP10 Spoilee. She wants to learn how to spin...well here comes the means, the tools, and instructions to do so along with a 1/2 pound of extra fiber of the same color. WEeeeeeee! Coffee?? I love this organic free trade coffee!! Coffee!!!! I've got a crazy coffeee high......EEEeeeeeeeeeeeeeeeee!

Here is the BF working hard at trying to add some sparkle to a piece of his bracelet where the gold leafing has rubbed off. He hates his picture being taken. Tough-I say! I am a shutter bug! *click-click-click* Gotcha!
Until next time...
4/03/2007
Belt Display Rack-Easy...Patience? HARD!!!
 I am so excited about this latest project, a display rack for my karate belts. Why buy one premade, when I can make one for half or less of the price? I see them being sold on Ebay for $20 plus $10 shipping...but for that much money, I can buy all the supplies I need and then some to make my own. Granted it LOOKS handmade, but that is a BONUS plus I can say "I made it" to those who inquire. Right now there are only slats for four belts, but come payday I will get enough oak boards to make a 10 level rack.
I used 1/4 wood pegs to stick the boards to the back dowels which are square hardwood dowels. I love Menards! I then drilled a 1/4 hole through all the slats at once so that they would all have the same off center holes. LOL Then I took each slat, number then and placed them on the dowels and marked where to drill the connecting 1/4 holes. A bunch of pounding later, they are attached without the use of unsightly screws and nails. I had to saw off the ends of the pegs and sand them flush to the boards before applying stain (classic cherry) and right now a layer of poly is drying on them. This is so simple to make!! All I will need to display the belts is some double sided velcroe strips (the kind they sell to keep cables organized).
It needs a headboard. I looked at one of the Goodwills to see if they had something about 2 feet long that I could paint over but they did not. I am not sure what kind of headboard I will add, but I will want to engrave it. I think I can do that with the router attachment for the dremal tool. I'd like to engrave my name in Chinese characters and then engrave my name in english below it. That sounds too fancy for my skill level though. Wood engraving would cost too much I think so maybe I will just get some asian rub-on accents if I can find any and then just add my name in wood letters so it pops out. Hummm...I still have some money left on my Bday Hobby Lobby gift card....time to hit the place again!! One of the wood hobby shops should have already shaped headboards with routed edges. I'll have to browse online first to see what is available.
Until next time...
3/17/2007
Completed first section of scrapbook...
 And all of a sudden I have scrapbook madness...it's the bug...it's inside me!!! Inside the cover there is a sticker that reads "Dare to dream then watch what happens!" and this so describes how I got to do karate. I dared to dream...and the opportunity showed itself. Quite amazing actually. "Believe in Yourself" was a rub on that looks like it was printed on the page. I have that picture on the first page for a reason. So that if I ever become discouraged, I can always pick up this book and SEE how happy I was and how I feel about learning karate.

I have a lot of  scrapbooking and stamping supplies from when I used to do both, so I dug out those and set to work. The little red thing is a piece of friendly plastic melted, then stamped with an asian themed stamp. You can't really see the detail here but it kinda looks like an equal armed cross in the plastic. Which is OK.
This will serve as some documentation for WTI. I think it will serve for several subjects in WTI actually as I plan to do this everytime I go up a belt color. I did email karate America and did confirm that indeed the cost to get promoted is an extra$30 in addition to the $99 a month for the tuition.
 scrapbooking and stamping supplies from when I used to do both, so I dug out those and set to work. The little red thing is a piece of friendly plastic melted, then stamped with an asian themed stamp. You can't really see the detail here but it kinda looks like an equal armed cross in the plastic. Which is OK.
This will serve as some documentation for WTI. I think it will serve for several subjects in WTI actually as I plan to do this everytime I go up a belt color. I did email karate America and did confirm that indeed the cost to get promoted is an extra$30 in addition to the $99 a month for the tuition.
DAMN!
I'm told it pays for the new belt, the promotion cermony, certificate, and card (not sure what kind of card I will be getting...).
Until next time...
3/04/2007
How to Make a Polymer Clay Cartoon Cat

Another one curtisy of my Google homepage widget: How To of the Day
http://www.wikihow.com/Make-Polymer-Clay-Cats
Until next time...
2/21/2007
OOOO softy-lofty-yarny-p0rny-goodness(y?)
Okay I could not wait to try out the new skien winder so I started to spin up the HUGE ball of combed fiber I had been prepin here and there through-out the last week. The picture of the wound ball of fine shetland singles I had to sharpen up a bit to get more detail to show. Camera does not like blues, purples, and bright whites. This is a HUGE ball of singles and I stil have half of it to ply up because the bobbin was filled on HALF of the singles!

You can see the winder in use and it is tall enough that I can wind directly off the Kiwi with little to no assistance from me. NICE! We were watching a PBS special on the Blue Man Group. See them on the tellie (along with the cluttered mess? Can't help it. Two people living in a small apartment with all thier junk stuffed into every nook and cranny...a couples life). The yarn I got from these singles is luciously soft and lofty and oOOOOooo so yarn p0rny goodnessy! It is much easier to tie a figure right tie on the floor winder because it is about my hieght and I can easily turn it to tie the other sides. I cannot wait to dye it! I am thinking turquoise with a touch of royal blue and lilac purple...OOOOooo.


You can see the winder in use and it is tall enough that I can wind directly off the Kiwi with little to no assistance from me. NICE! We were watching a PBS special on the Blue Man Group. See them on the tellie (along with the cluttered mess? Can't help it. Two people living in a small apartment with all thier junk stuffed into every nook and cranny...a couples life). The yarn I got from these singles is luciously soft and lofty and oOOOOooo so yarn p0rny goodnessy! It is much easier to tie a figure right tie on the floor winder because it is about my hieght and I can easily turn it to tie the other sides. I cannot wait to dye it! I am thinking turquoise with a touch of royal blue and lilac purple...OOOOooo.


Until next time...
Floor Skien Winder...from conception to completion


I have been, for the longest time, been trying to buy myself a swift. But, I've never gotten around to it because I think they cost too much for what they are. So what do I do? You guessed it, I went and bought some supplies to make my own. I took the plans for the Build a Little Great Wheel put out by Interweave's Spin-Off and adaped the connection of the wheel to the frame of the home-made wheel to the constuction of this floor model swift/winder/what-cha-ma-call-it. Now this is a super ruff construction, made only to be functional...not decor ready. But, it works and I spend under $10 on it's construction and all supplies were bought at the local Menards. The skien size I get from this is is 29 inches...plenty big for the average skien. If I ever want to make a larger skien for self stripping yarn, I only seen to go and buy longer oak boards and construct a wider cross. It works great the way it is, although I need a slightly longer bolt as one of the arms keeps hitting the body of it. The base needs to be a bit wider, or I need to make a stabelizer as it tends to wobble, but for now I can put my foot onto the base to hold it steady. I used two oak boards at 1/2" x 2" x 2' for the arms and mitered a small portion out of the center of both of them, then glued them together with Gorilla glue. You will want a dowel, I used one three foot dowel and cut it every 7 inches. This will give you 5 pegs with one being a little longer than the rest. This one will be your "handle" for turning the device. Find a hole borring bit that is the same size of the dowel you have chosen. I used 5/8th dowels and so used a 5/8th bit.
Before drilling a hole in the center of the boards you want to try and find as close to the exact center as possible without having to purchase further equipment (think frugal). Then measure from each end and mark one inch and two inches. Mark the center (as close as possible) between the one and two inch marks. This gives an inch of board sticking out to hold the yarn on the pegs. C-clamp both boards together and drill all the holes through both of them at once. Unclamp the boards and drill ONE MORE hole in ONE BOARD between the center hole and the end hole. This is where your handle peg will go.
Miter out (either with hand chisels or a dremel if you have one) a "thumb-nails" worth of wood...about 1/8 of an inch...or one quarter of the boards thickness. Miter them out so that the holes will match up when glued together. Sand the mitered portions lightly..ready, set, Gorilla Glue! Place a clamp on the glued pieces and let sit overnight. Love that gorilla glue!
While that is drying, construct the base. You may want to make something wider than I have, so I will not include the base construction here. For the main post, I used 2x2 square fence post boards that are super cheap, and super dry. You will want to seal these with some tung oil (or some other kind of wood oil) to keep them from splitting in the future. About 4 inches from the top of the pole, mark as center as possible and drill a hole slightly smaller than a 1/4 5/16 bolt. You want to pre-drill the hole to keep the wood from splitting, but you want it slightly smaller so that the threads will catch.
The next day gather up a 3 1/2 4 inch long 1/4 5/16 hex carriage bolt (preferably one that has about an inch near the top of the bolt that has no threads-if that cannot be found follow the intructions for making the "Wheel Shaft Carriage Bolt", page 3, of the PDF for making a little great wheel), two three regular 5/16 nuts, one 5/16 lock nut, and 4 washers that will fit the bolt. I drilled too big of a hole through the main shaft so I used wider than usual washers to steady the resulting wobble so I had to drill a slightly smaller hole above it with a 3/8 hole borring bit.
To put everything together, add a washer to the bolt, put the bolt through the cross arms (after glue has dried) first. Now add one washer andone two nuts. You want to leave a small space between the first nut and the cross arms so there is enough room for the arms to swing freely, but not wobble, then tighten the second nut snuggly up to the first one. This keeps the first nut from coming unscrewed with continued use. Now add one more washer and insert the whole get-up through the main shaft. Add the last washer, and the lock nut. Hand tighten only. Now slide the pegs through all the holes and take pride in your newly made yarn winder. (BIG GRIN). I did not glue the pegs in so that I could take it apart for storage if I need to in the future. The pegs did not fall out when I tested it-although one peg is pointing downwards slightly because I do not have a bench press to drill perfectly stright holes with. What I will likely do is simmply add some rubber O rings to the ends to help prevent yarn from rolling off. My test skien did not roll off.
If you have any questions on the construction of this nifty home-made thang, feel free to ask. Be as specific as possible because "It's not working for me." will not enable me to help you at all.
Until next time...
Revised: 2.22.07
2/02/2007
My Hand-Made Shuttle Beater
 WOOOOOooohoooooo! Done! I've been seeing these on Ebay and it looks simple enough to make, and it was simple to make. I used 1/4 inch thick oak board from Menards to make this one and a routing attachment gadget for the dremal. As soon as I figure out how to put on a fresh sand paper cover on the drum sander bit...I'll pretty up the inside of the yarn holding...hole. I don't know the technical word for it. It's a shuttle...it's a beater...it's a Shuttle Beater! Took about 20 minutes to plan, cut and sand out.

Until next time...
1/26/2007
UFO on hand-made Square needles

Here are those new needles I made, already at work on a panel to the afgahn I plan to send my Mum. It is smoky blue Chinelle paired with Peacock Boa yarn. It looks like water with lettuce being churned in it!
These square needles really are easier to hold and handle, just like the claims say! For once, something is true on the internet!
Until next time...
Subscribe to:
Posts (Atom)